How to install a socket (part I)
Here is how I spend my days when I am not looking for a job (or doing nothing): I install sockets in my parents' future house. These days, I've installed all kinds of sockets: phone, TV, ethernet, and, of course, electricity. I'm almost done now, only a few more to install, and I'm sure my father will find another occupation for me ;)
In France, we use type E sockets and plugs. I will explain to you, lucky reader, how to install one (who said I got nothing to do ?), that is, how to transform
this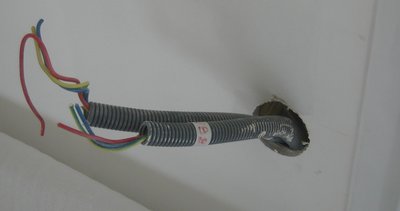 into that
 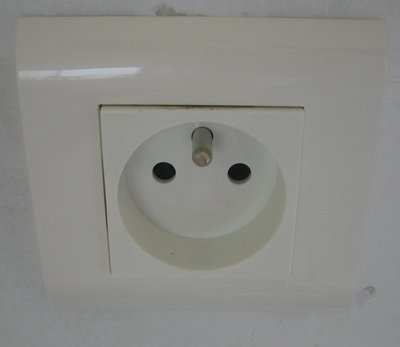 .
.
Since I feel it's a bit long, this will be cut in two (or maybe more) articles.
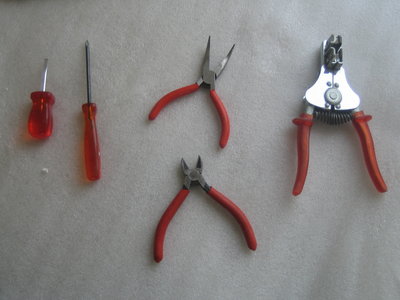
Various kinds of pliers and screwdrivers. Notice the curbed pliers in the top: ideal shape to pick your nose with it!
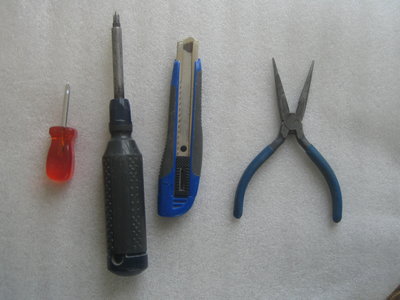
more screwdrivers (you never know, might be useful), a knife (what's the proper word ? anyway, be careful not to cut yourself; preferably, ask an adult to do the parts making use of it), and more pliers (that's the model for people with a long nose).
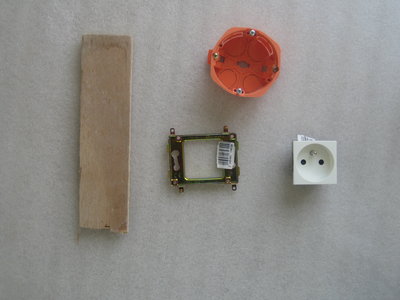
Of course, you're going to need the socket itself, the plastic box to put it in, isolated from the wall, a metal grid to fix the socket to the isolating box, and a piece of wood, which can be useful to threaten the plastic box, in case it refuses to get in the wall (BRUUUUTAAALIIIIIIIIIIST ! [1]).
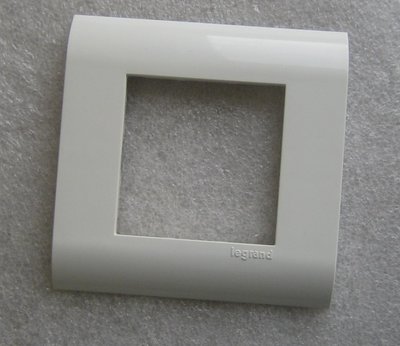
If you want your socket to look beautiful, you're going to put some clothes on it...
The map
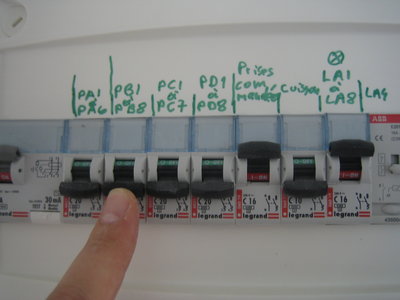
Once you have checked which socket you are going to install, check carefully that the fuse for that socket is deactivated (ask an adult if you're too short to reach the fuse box, or if you can't read).
You have to cut that grey thing (which probably has a proper name in english, from here on, we'll call that a snake). You should cut it at the right length, so that at the end a small length of it (about a centimetre) will be in the plastic box.
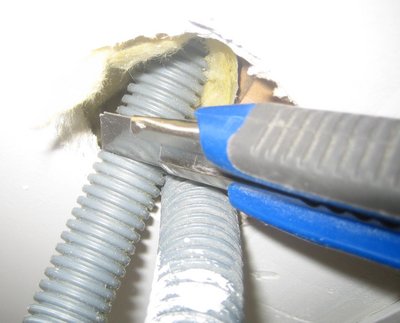
Cutting...
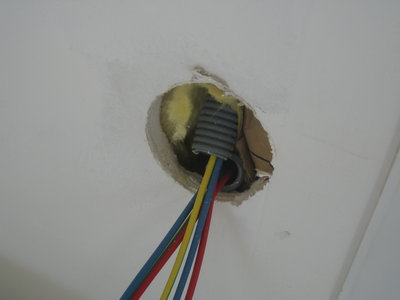
Result.
Once you have your holes ok, make the wires go through these.

And then, you simply put the box in the hole in the wall... Com'on! Get into it! Bitch! It doesn't fit!
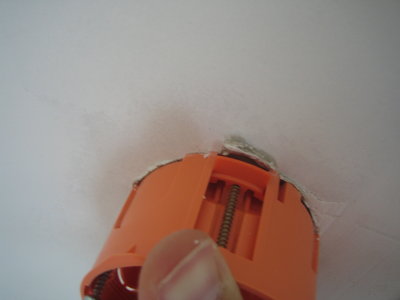
The hole is too narrow :/
Don't worry, there is a BRUUUUTTAAAAALIIIIIIIIST [1] solution to every problem. Remember that piece of wood among our tools ? It's time to use it. Put it on the orange box, and hammer it with your fist (sensitive people -girls- : use a hammer instead), in the direction of the hole. It won't resist long, I promise.
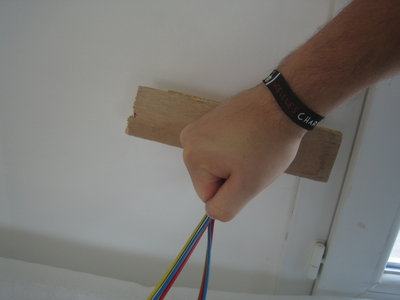
Notice the nice wristband of the operator.
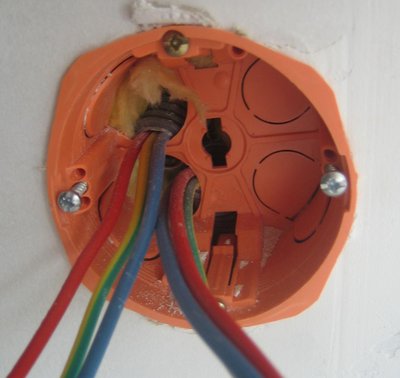
Now, who's the boxx ?
On the picture above, you can see the box is in the wall, but the snakes (they are shy animals) are hidden behind it. For obvious insulation reasons, we want them inside the box. The pliers come handy here.
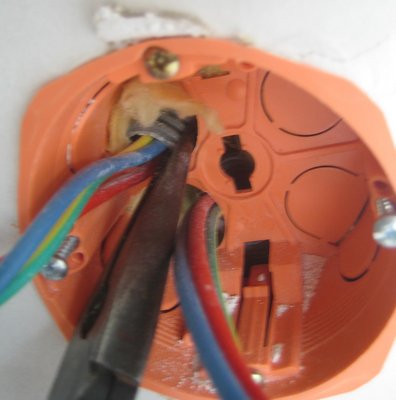
Pull the snakes inside the box with the pliers
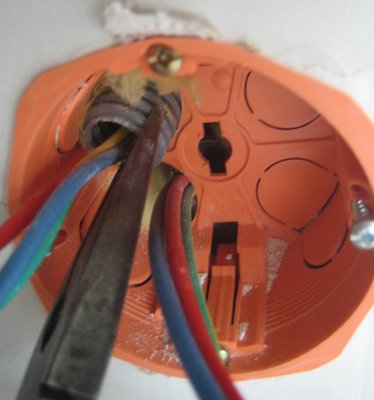
like this
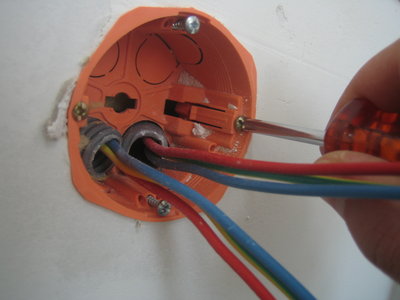
Now, screw the hooks so that the box is tightly fastened to the wall.
This is it for the first part. Now, you're ready to connect the socket and put it in the box, but we'll see that in the next lesson :)
[1]: if you don't understand this, it's because you don't need to
In France, we use type E sockets and plugs. I will explain to you, lucky reader, how to install one (who said I got nothing to do ?), that is, how to transform
this
into that .Since I feel it's a bit long, this will be cut in two (or maybe more) articles.
0. Tools & Hardware
First of all, you need some tools:Various kinds of pliers and screwdrivers. Notice the curbed pliers in the top: ideal shape to pick your nose with it!
more screwdrivers (you never know, might be useful), a knife (what's the proper word ? anyway, be careful not to cut yourself; preferably, ask an adult to do the parts making use of it), and more pliers (that's the model for people with a long nose).
Of course, you're going to need the socket itself, the plastic box to put it in, isolated from the wall, a metal grid to fix the socket to the isolating box, and a piece of wood, which can be useful to threaten the plastic box, in case it refuses to get in the wall (BRUUUUTAAALIIIIIIIIIIST ! [1]).
If you want your socket to look beautiful, you're going to put some clothes on it...
1. Check
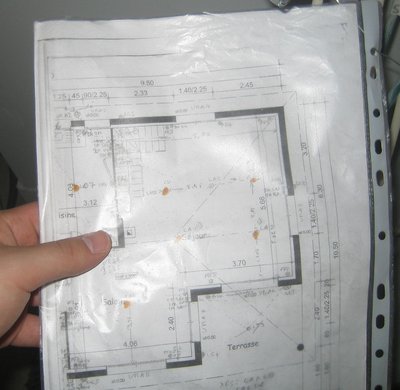
If you don't want to get an electroshock, you gotta check the map first, to know what socket you're going to install. In our case, it's called "PB7". A very romantic name indeed. Some may think it is called like this because I've watched prison break too much. That's wrong, my dad choosed that name: P is for Prise (the french for socket), B is the series of sockets it is in, which consists in 8 sockets, numbered PB1 to PB8.The map
Once you have checked which socket you are going to install, check carefully that the fuse for that socket is deactivated (ask an adult if you're too short to reach the fuse box, or if you can't read).
2. Cut
Now that you're sure to be safe, you can start messing with the wires. Keep an eye on your little sister, though, you don't want her to play with the fuse box and turn on the juice on your wires !You have to cut that grey thing (which probably has a proper name in english, from here on, we'll call that a snake). You should cut it at the right length, so that at the end a small length of it (about a centimetre) will be in the plastic box.
Cutting...
Result.
3. Put the Box
Now, it's time to put that orange plastic box in the wall. Before that, you have to "open" two holes according to the positions of the grey snakes. To know which holes to open, you must have noticed there are 4 screws on the box: two connected to hooks, to fix the box on the wall, and two to fix the grid to the box. The screws linked to the hooks must be oriented vertically.Once you have your holes ok, make the wires go through these.
And then, you simply put the box in the hole in the wall... Com'on! Get into it! Bitch! It doesn't fit!
The hole is too narrow :/
Don't worry, there is a BRUUUUTTAAAAALIIIIIIIIST [1] solution to every problem. Remember that piece of wood among our tools ? It's time to use it. Put it on the orange box, and hammer it with your fist (sensitive people -girls- : use a hammer instead), in the direction of the hole. It won't resist long, I promise.
Notice the nice wristband of the operator.
Now, who's the boxx ?
On the picture above, you can see the box is in the wall, but the snakes (they are shy animals) are hidden behind it. For obvious insulation reasons, we want them inside the box. The pliers come handy here.
Pull the snakes inside the box with the pliers
like this
Now, screw the hooks so that the box is tightly fastened to the wall.
This is it for the first part. Now, you're ready to connect the socket and put it in the box, but we'll see that in the next lesson :)
[1]: if you don't understand this, it's because you don't need to
No comment
Comments are closed.